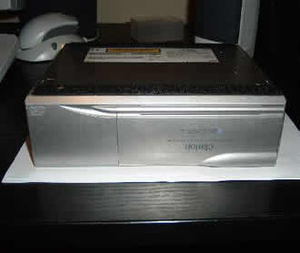
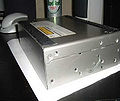
NG 900/9-3 Clarion CD634 CD Changer Lens Cleaning
Contents
Overview
After prolonged periods of use CDs that previously worked perfectly can start 'skipping' or in some cases refusing to play at all. Once you have established that it is not the discs that are at fault then cleaning the lens of the laser that reads the discs may well be the solution.
There are various commercially available products that are designed to do this but I have found most of them to be ineffective and they also cost money, so I prefer to do it manually, it's easy, it's quick and it's cheap!
Please note that these instructions are only for the Clarion CD634 6CD autochanger. Other changers may be similar but I cannot guarantee that the process is the same.
Tools Required
- Small Phillips (Crosshead) Screwdriver
- Cotton Bud
- Denatured Alcohol - e.g. tape head cleaning fluid
Time
approx. 15 - 30min
Procedure
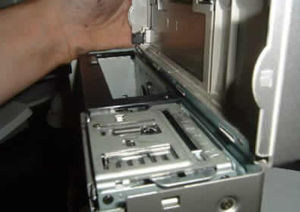
1) Remove the CD Magazine BEFORE you remove the changer from the car - if you don't you will not be able to get to the lens to clean it! 2) Unplug the lead from the changer, de-mount it and remove it from the car. 3) Place the unit upside-down on a flat, clean, and preferably anti-static, surface.
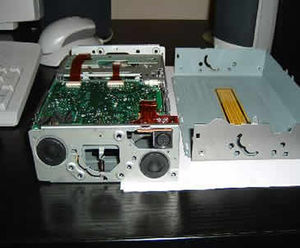
4) Unscrew and remove screws 1 & 2 then turn the unit around and remove screws 3 & 4
5) Lift the back end of the cover up until it is at approx 90deg's to the unit and pull it away from the the face plate.
6) Remove the face plate by tilting it forwards 90deg and and away from the other cover.
7) Remove screws 5,6,7 & 8 (see pictures above)
8) Gently remove the inner assembly of the unit from the other cover. You may find that the rubbers that form the anti-shock suspension are stuck to the sides of the cover but they can be gently persuaded out - they are not glued and you will not damage anything if you are careful. Take care not to touch the circuit board!
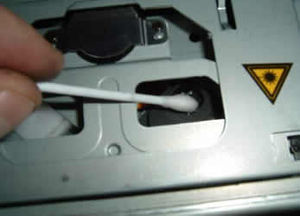
9) With the assembly removed turn it over so that the PCB is facing down. You should now be able to see the lens.
10) Dip one end of the cotton bud in the alcohol and, GENTLY, using a twisting motion, wipe the lens. Then use the other (dry) end of the cotton bud to remove the excess fluid and leave it to dry off completely.
11) Turn the complete inner assembly back over so that the PCB is facing upwards and place it back into the cover you removed it from making sure that it is the correct way round.
12) The suspension rubbers may have come unseated from the recesses on the plates at either side. Put them back in place and line up one of the screw holes on the inner plate with the hole in the cover and fix with one of the screws. Repeat this until the four screws are back in place. Be careful not to cross thread the screws! Note: line up the screw and slowly turn it anti clockwise until you feel it 'click' then tighten.
13) Replace the face plate.
14) Offer up the other cover to the face plate at a 90deg angle to it. Ensure the tabs on the face plate are in their holes on the cover and lower the cover down so that it is seated fully.
15) Replace the remaining four screws.
16) Remount the unit in the car and plug in the lead.
